Configuring the Ubuntu firewall with UFW (Uncomplicated Firewall) helps protect your VPS by allowing essential connections and blocking unnecessary incoming traffic. The setup takes only a few commands, but their order matters: allow SSH before enabling the firewall, or you could lose remote access.
This tutorial shows how to install UFW, configure safe defaults, open website ports, activate the firewall, and manage rules afterward.
Key Takeaways
- UFW provides a simple command-line way to manage the Ubuntu firewall.
- Allow your actual SSH port before enabling UFW on a remote VPS.
- Deny unsolicited incoming traffic by default, then open only the ports your services need.
- Verify access from a second connection and review rules whenever you add or remove applications.
What Is UFW on Ubuntu?
UFW is a firewall configuration tool that manages rules for the Linux kernel’s packet-filtering system. Rather than writing low-level rules, you can allow or deny connections with commands such as ufw allow and ufw delete.
For a typical web-hosting VPS, you’ll allow SSH for administration and ports 80 and 443 for visitors. Database and internal application ports should generally remain inaccessible from the public internet.
Before You Configure the Ubuntu Firewall
You’ll need an Ubuntu VPS with sudo access and a working SSH connection. If you’re new to remote administration, see ZYNOO’s SSH commands for beginners.
Keep your current SSH session open. Check that your VPS provider’s web or recovery console works. Provider-level network firewalls are separate from UFW and may also need appropriate rules.
These instructions assume a fresh or inactive UFW configuration. If UFW is already active, inspect its rules and service requirements before changing the default policy.
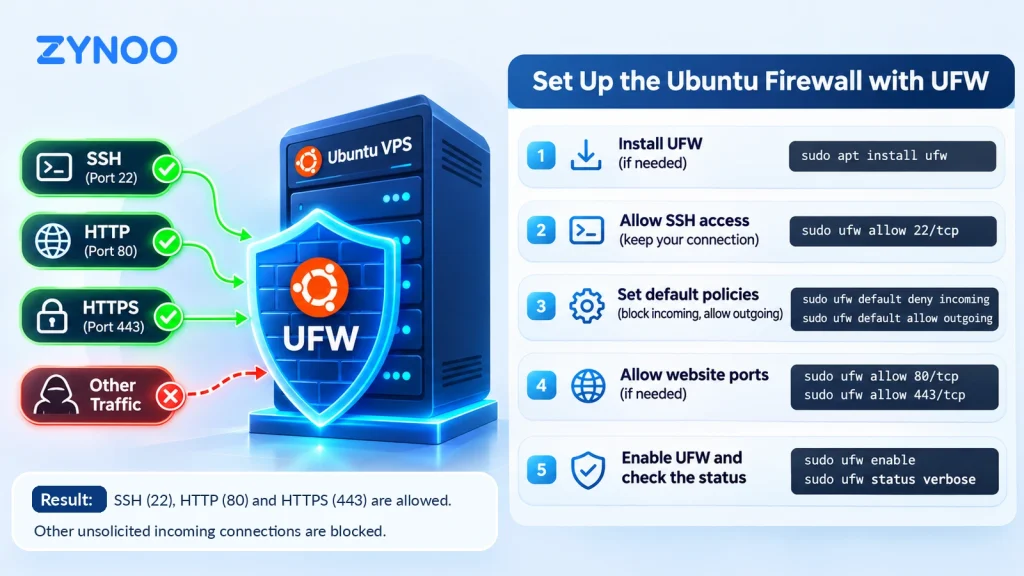
Step 1: Check and Install UFW
Check whether UFW is available:
sudo ufw statusStatus: inactive means it’s installed but not enforcing rules. If the command isn’t found, install it:
sudo apt update
sudo apt install ufw
Don’t enable the firewall yet.
Step 2: Allow SSH Before Enabling UFW
Find the TCP port where SSH is listening:
sudo ss -ltnpCompare the output with the port used by your SSH client. Port 22 is common, but VPS configurations can use another port.
If SSH uses port 22, run:
sudo ufw allow 22/tcpIf SSH actually uses a custom port such as 2222, allow that port instead:
sudo ufw allow 2222/tcpPort 2222 is an example, not an additional port everyone should open. Review your pending rules:
sudo ufw show addedStep 3: Set Default Rules and Check IPv6
Use a default-deny policy for incoming connections while allowing the VPS to initiate outgoing connections:
sudo ufw default deny incoming
sudo ufw default allow outgoing
If your VPS has public IPv6 connectivity, confirm UFW handles it:
grep '^IPV6=' /etc/default/ufwThe expected setting is IPV6=yes. If IPv6 is in use but this is set to no, edit /etc/default/ufw to enable IPv6 handling before activating the firewall.
Step 4: Open the Ports Your Website Needs
If the VPS hosts a public website, allow HTTP and HTTPS before activating UFW:
sudo ufw allow 80/tcp
sudo ufw allow 443/tcp
Common ports for an Ubuntu VPS are:
| Service | Port | Protocol |
|---|---|---|
| SSH | 22 (or your custom port) | TCP |
| HTTP | 80 | TCP |
| HTTPS | 443 | TCP |
For a public application on a different TCP port, the UFW allow-port syntax is:
sudo ufw allow 8080/tcpOnly run that example if your service needs external access on port 8080. For a UDP service, specify /udp instead, such as sudo ufw allow 51820/udp for a WireGuard endpoint configured on that port.
You can also check available application profiles:
sudo ufw app listIf Nginx Full is listed, inspect its ports with sudo ufw app info 'Nginx Full'. The command sudo ufw allow 'Nginx Full' can replace the two website-port rules above; you don’t need both approaches. Applications behind a local Nginx reverse proxy generally shouldn’t expose their backend port publicly.
Step 5: Enable UFW and Verify the Firewall
Once SSH and any required service ports are allowed, enable UFW:
sudo ufw enableIt may warn that the operation could affect SSH. Proceed only after confirming your SSH rule and recovery access. Check the live rules:
sudo ufw status verboseYou should see Status: active, default policies, and your allowed ports. UFW also enables itself at boot.
Before closing your original SSH session, connect again from a second terminal. From your own computer, use ssh -p 22 username@server-ip, replacing the username, address, and port as needed. Test your website externally if you opened ports 80 and 443. An ALLOW rule alone doesn’t prove the service is reachable.
Step 6: Manage, Restrict, and Delete UFW Rules
To list firewall rules with numbers:
sudo ufw status numberedTo delete an outdated allow rule, for example TCP port 8080:
sudo ufw delete allow 8080/tcpYou can also delete by rule number (sudo ufw delete 3), but check the current listing first: numbering can change, and deleting by number may remove only one of a matching IPv4/IPv6 pair.
Optional: Restrict SSH to Your IP
If your administrative IP is stable, you can restrict SSH to that address. For example:
sudo ufw allow from 203.0.113.10 to any port 22 proto tcpReplace the example IP with your real public IP. Test a new login from that address, then remove the old blanket rule with sudo ufw delete allow 22/tcp. Leaving the blanket rule in place would still allow everyone. Keep the original session and recovery console available throughout.
Optional: Rate-Limit SSH Attempts
Alternatively, if you need SSH accessible from changing IPs, replace the broad allow rule with a connection-rate limit:
sudo ufw limit 22/tcp
sudo ufw delete allow 22/tcp
sudo ufw status numbered
Only do this after confirming a working SSH connection and recovery access; use your actual SSH port instead of 22 if different. Test another login afterward. This is an alternative to IP-only access, not something to combine with it. Rate limiting doesn’t replace SSH key authentication.
Step 7: Check Logs and Troubleshoot Access
Enable basic logging when you need to investigate blocked traffic:
sudo ufw logging on
sudo ufw status verbose
UFW logs may be available in the system journal or /var/log/ufw.log, depending on your logging setup.
If SSH becomes unreachable, use your provider’s recovery console to inspect the active rules. As a temporary emergency measure, sudo ufw disable stops enforcement; correct the SSH rule and enable UFW again.
If your website fails to load, check listening services with sudo ss -ltnp, UFW’s rules, and any provider firewall. Opening a port does not start the service behind it.
Frequently Asked Questions
Yes. Once you run sudo ufw enable, UFW is enabled for subsequent boots. Check its configuration with sudo ufw status verbose.
No. Rules added or removed through UFW take effect without rebooting the VPS. You can inspect the current configuration immediately.
Not necessarily. Docker-published ports can bypass ordinary UFW input rules because Docker configures its own networking rules. Review Docker’s firewall documentation before relying on UFW to restrict container access.
Conclusion
A secure Ubuntu firewall setup with UFW starts by allowing SSH, applying a default-deny incoming policy, and opening only the ports your applications need. After enabling UFW, verify access from a separate connection and remove obsolete rules as your VPS changes.
UFW handles network access, not application-level abuse. For public Nginx websites, request rate limiting is a useful additional safeguard.