Nginx rate limiting is a built-in feature that controls how many HTTP requests a client can make within a given period. It can reduce abusive traffic targeting APIs, login pages, and resource-intensive applications without requiring additional software.
In this guide, you’ll configure Nginx request limits, test them safely, and enable protection on an Ubuntu server.
How Does Nginx Rate Limiting Work?
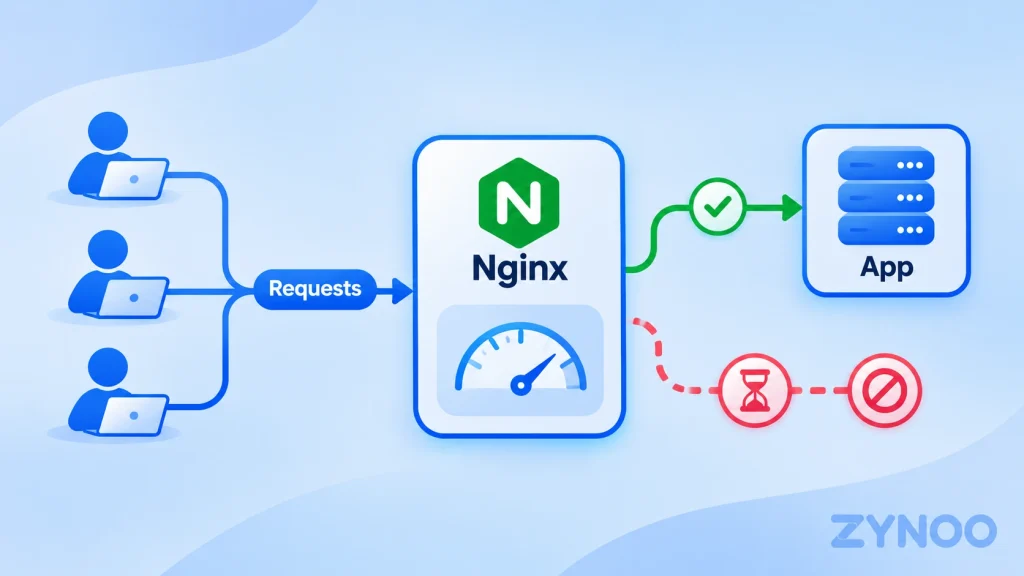
Nginx uses the limit_req module to track incoming requests, commonly by client IP address.
For example, you can configure an average limit of five requests per second while allowing short bursts of traffic. Requests exceeding the permitted burst can then be rejected.
This helps prevent excessive requests from overwhelming your application.
Note: Rate limiting helps mitigate certain Layer 7 HTTP floods. It cannot stop large network-level DDoS attacks that saturate your connection.
Prerequisites
You’ll need an Ubuntu server with Nginx installed, SSH access with sudo privileges, and an existing website or application.
Before making changes, back up your existing website configuration.
Step 1: Define a Rate-Limiting Zone
Connect to your server through SSH.
On a standard Ubuntu Nginx installation, create a new configuration file:
sudo nano /etc/nginx/conf.d/rate-limit.confAdd:
limit_req_zone $binary_remote_addr zone=perip:10m rate=5r/s;This configuration uses the client’s IP address to track requests, allocates 10 MB for tracking data, and sets an average limit of five requests per second per IP.
The limit_req_zone directive must be placed inside Nginx’s http context. The standard Ubuntu configuration includes conf.d files there.
Save the file.
Step 2: Enable Rate Limiting for Your Website
Open your existing Nginx website configuration:
sudo nano /etc/nginx/sites-available/app.example.comReplace the filename with your actual configuration.
For an HTTP application running on port 3000, a protected API endpoint could look like this:
location /api/ {
    limit_req zone=perip burst=10 nodelay;
    limit_req_status 429;
    limit_req_dry_run on;

    proxy_pass http://127.0.0.1:3000;
}
Here’s what the important directives do:
limit_req: Applies the previously defined limit.burst=10: Allows a short burst of excess requests.nodelay: Processes permitted burst requests immediately.limit_req_status 429: Returns HTTP 429 when requests are rejected.limit_req_dry_run on: Records excessive requests without blocking them.
Important: Add these rate-limiting directives to your existing matching location block. Don’t create duplicate locations or replace your existing backend configuration.
The values shown are examples. Choose limits based on your application’s normal request patterns.
Step 3: Validate Your Nginx Configuration
Check the configuration:
sudo nginx -tIf the test succeeds, reload Nginx:
sudo systemctl reload nginxIf an error appears, correct it before reloading.
Step 4: Test the Rate Limit
Because dry-run mode is enabled, requests won’t be rejected yet.
Monitor the Nginx error log:
sudo tail -f /var/log/nginx/error.logFrom another terminal, send a small test burst to an endpoint you control:
for i in $(seq 1 15); do
  curl -s -o /dev/null -w "%{http_code}\n" \
  https://app.example.com/api/health
done
Replace the URL with a working endpoint on your own test or staging application.
If requests exceed the limit, Nginx should record messages containing limiting requests, dry run in its error log.
Your application should continue returning its normal responses because enforcement isn’t enabled.
Step 5: Enable Rate Limiting
Once you’ve reviewed the results and confirmed your limits are appropriate, remove this directive from the protected location:
limit_req_dry_run on;Validate and reload Nginx again:
sudo nginx -t
sudo systemctl reload nginx
Excessive requests can now receive HTTP 429 Too Many Requests.
Repeat a controlled test and check the response codes. The exact results depend on request timing and your configured limits.
How to Undo the Changes
If legitimate users are affected, restore:
limit_req_dry_run on;Validate and reload Nginx. This returns the configuration to monitoring mode without rejecting requests.
You can then adjust the limits based on real traffic.
Important: Nginx Behind Cloudflare or Another CDN
When Nginx sits behind a reverse proxy, the client IP visible to Nginx may belong to the proxy rather than the original visitor.
Applying per-IP limits without correcting this can group unrelated users together.
Configure trusted client-IP handling using Nginx’s Real IP module and your proxy provider’s documented IP ranges before enforcing per-client limits.
Never trust arbitrary visitor-supplied IP headers.
Does Nginx Rate Limiting Replace DDoS Protection?
No. Nginx can limit excessive HTTP requests reaching your application, but it cannot filter traffic that has already saturated your server’s upstream network connection.
For broader protection, combine application-level controls with hosting-level mitigation.
Frequently Asked Questions
Yes. Nginx Open Source includes the limit_req module.
Yes. Overly strict settings can reject legitimate requests, especially when several users share one IP address. Test in dry-run mode before enabling enforcement.
Yes. It’s particularly useful for controlling excessive requests to API endpoints and other resource-intensive application routes.
Conclusion
Nginx provides built-in rate limiting that can help reduce abusive HTTP traffic without requiring additional software.
Configure the request limit, test it in dry-run mode, and enable enforcement only after reviewing the results.
For comprehensive server protection, use rate limiting alongside appropriate upstream DDoS mitigation.